Category Archives: Project Management Key Concepts

Schedule Compression

Project Schedule Compression Techniques

– See All Project Management Key Concepts –

Project Schedule Compression Techniques - PMBOKProject Schedule Compression Techniques

What happens if we want to compress our schedule? Maybe it’s going to take a long time and we want to make it shorter – that’s where schedule compression techniques come into play.

Schedule compression is a technique that’s used to shorten or accelerate the schedule duration without reducing the project scope. We still want to deliver what we are delivering – that business value as part of our project – but we might have certain schedule constraints, imposed dates that we need to meet or other schedule objectives. So we need to compress that schedule.

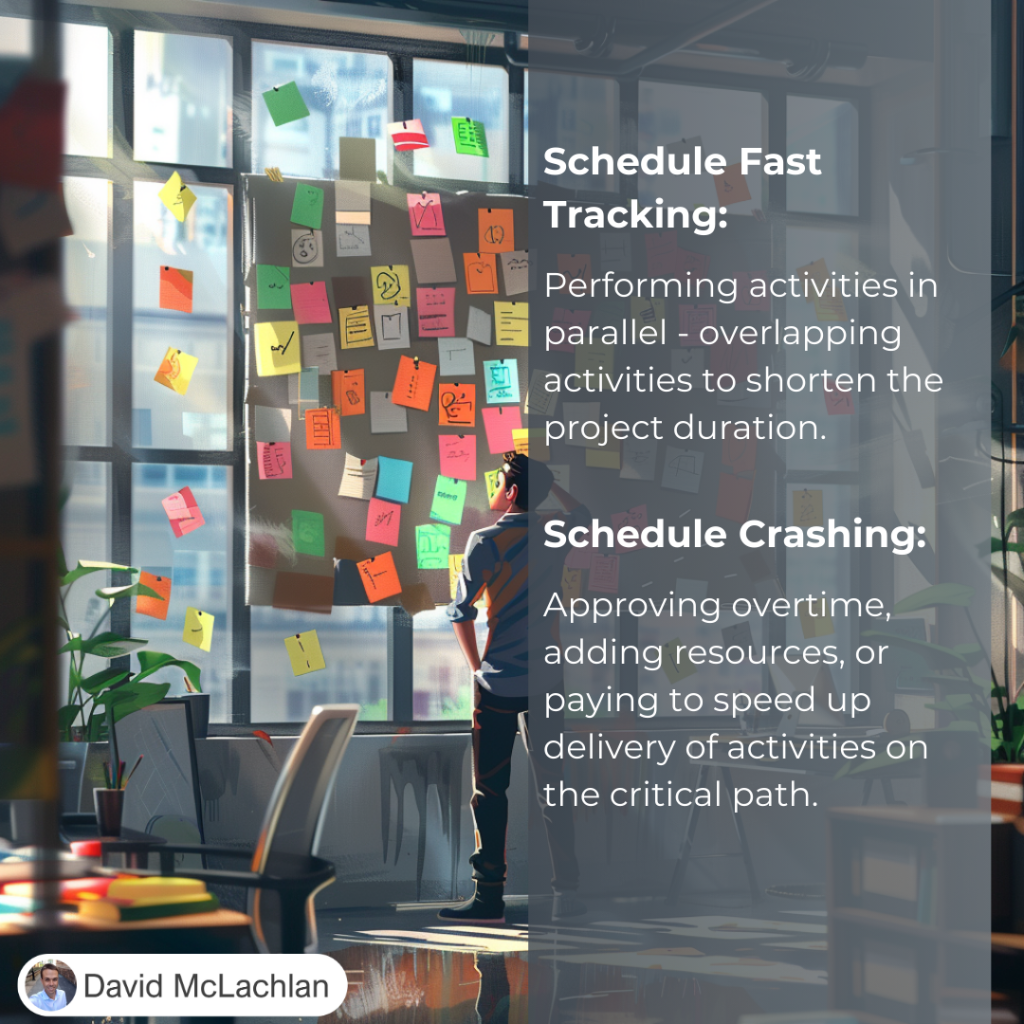
There are two main compression techniques that you’ll see on the PMP exam and in the Project Management Body of Knowledge, and even in your project management career. Those two are “crashing” the schedule, which shortens the schedule duration by adding resources. That can be very costly as we’re adding more people or things. The other one we’re looking at is fast tracking, where activities or phases normally done in sequence are now performed in parallel or at the same time for at least a portion of their duration. That way we’re able to cut back on the time frame.

Schedule Compression

Let’s look at a few examples.

Crashing might involve approving over-time, adding resources, paying to expedite the delivery of activities on the critical path. Of course because of that crashing may result in increased risk, and certainly an increased cost.

As an example up the top here we’ve got Task 1, Task 2, Task 3 as our normal schedule with just one person assigned to each. But if we’re crashing this project schedule we’re adding resources to it, so now all of a sudden we’ve got a lot more resources there and we’re able to shorten the time of that task.

You have to be aware of the law of diminishing returns here, where sometimes adding more and more people -your return on that investment will get less and less over time. Sometimes adding more people isn’t the answer. But in this case, when we’re crashing a project we’re looking for that to be the answer to reduce our project schedule.

The other one is fast tracking, where we’re performing tasks in parallel. Again this might result in rework and an increased risk and cost, and it only works when activities can be overlapped to happen at the same time, to shorten the project duration on the critical path. We’re using the lead time, if there’s any lead time that we can take up we’re using that to perform those tasks in parallel. For example one, two, three in sequence but now one, two, three we’re performing some of these activities at the same time by fast tracking our project. Because we’re able to do that we don’t have to add more resources in this case, so the cost is a little bit less than if we were to crash the project with project resources. And that is the idea of schedule compression, crashing your schedule and fast tracking your schedule.

– David McLachlan

– See All Project Management Key Concepts –

The Critical Path and Float

– See All Project Management Key Concepts –

Critical Path and Float - PMBOKThe Critical Path and Float

This is separated into two parts, with the first outlining the Critical Path, and the second doing the forward and backward pass on the critical path method. Now all of this it can seem a little daunting at first, that’s why we’ve just separated it into two videos, but ultimately this one will give us a broad overview and the next one we’ll delve into it in a little bit more detail.

What is the critical path?

The critical path is the longest sequence of activities that make up a path through a project – so it is the longest sequence of activities, and that determines how soon were able to actually complete our project, which gives us the shortest possible project duration.

It’s the path that doesn’t have any slack in it – so there’s no leeway, no room to move, and that’s why it’s the most critical path.

The critical path method is used to calculate the critical path in our project, and the amount of free float and total float, which is the flexibility that we have in our schedule. Float is the leeway that we might have – can we delay an activity by one day or two days? If there’s two days of float, then yes.

Let’s have a look at an example.

Let’s say we’re starting our project schedule, we’ve got these durations in the top middle of our schedule network diagram. In this case we’ve got the durations of 5 days, 5 days, 10 days for this one and 15 days for our last one. The float is described in the bottom middle box, so we’ve got zero days of float. In other words, there’s no leeway for this one there’s no leeway for this one and there’s no leeway for this. That means our critical path is A, C and D.

If you noticed we’ve got five days of float here, that means we could potentially delay this activity by 5 days, there’s a little bit of leeway and we’d still be able to get the project done at the same time. That’s the idea that we’re looking at.

So again broadly or at a high level, Free Float is the amount of time that a scheduled activity – so a single activity – can be delayed without delaying the early start of any of its future activities. Total float or project slack is measured by the amount of time that a scheduled activity can be delayed or extended without delaying the project finish date. So zero float, as we said, is shown on the critical path. There’s no leeway on that critical path, and that’s why it’s critical.

We will delve into this in more detail looking at the critical path method and the forward and backward pass to calculate all of these lovely values as part of your schedule model.

– David McLachlan

– See All Project Management Key Concepts –

Project Variance Analysis (CPI and SPI)

– See All Project Management Key Concepts –

Variance Analysis - PMBOKWhat is Variance Analysis?

Variance analysis is really important because you’ll come across it not only in your projects but also throughout the PMP exam. What we’re doing is we’re reviewing the differences or the “variances” between the planned and the actual results of our project. That performance could be in our Cost or it could be in the Time or the Schedule, where we’re going along with our project. You can see duration estimates, cost estimates, resources and technical performance of our project and other activities and metrics. All of these things will differ from the way that we have planned – we can’t see the future unfortunately (no matter how hard we try) so the best we can do is plan up front and then track those actual results and see the variance between those results. And that’s where variance analysis comes in.

With variance analysis we might have examples such as Schedule Variance, where we’ve got our Earned Value (EV) minus our Planned Value (PV). Let’s say we’ve earned a hundred thousand dollars worth of value in our project and but we had actually planned say 150 thousand dollars worth of value. Then ultimately we are fifty thousand dollars behind in our in our project at the moment.

Likewise, the Schedule Performance Index (SPI) is Earned Value divided by the Planned Value. Let’s give ourselves another example – if we’ve earned seventy thousand dollars worth of value but we had actually planned a hundred thousand dollars (this is a nice easy one) then obviously 70 divided by 100 we’re looking at seventy percent, or point seven for the Schedule Performance Index.

As you can see, if we’re less than one we are behind schedule, if we are over one then we are ahead of schedule – we’ve delivered more value than what we were expecting.

We’ll go into these in more detail as we go into Project Cost Management and Project Schedule Management, but this is a really broad overview.

Cost variance and Cost Performance Index are similar to the schedule variance and SPI. When we’re looking at the Earned Value – let’s say that’s seventy thousand dollars again, minus the actual cost (let’s say we’ve only spent fifty thousand dollars) then all of a sudden we are twenty thousand dollars ahead in that scenario.

For the Cost Performance Index, if it’s under one then we’ve delivered less value so we are over budget. While this is a little bit confusing, if we’re over 1 for our Cost Performance Index then we are under budget because we’ve delivered more value than 1, which would be the normal amount.

These are a few examples of Variance Analysis, and you will come across more as we go through Schedule Management and Cost Management and the other project management processes in the project management body of knowledge. I hope this has helped, I’ll see you next time.

– David McLachlan

– See All Project Management Key Concepts –

Project Estimating Techniques

Project Estimating Techniques

– See All Project Management Key Concepts –

Project Estimating Techniques

Project Estimating Techniques

You will definitely see project estimating techniques mentioned as part of the PMP exam, so it’s good to know the four main different types and the differences between them.

Throughout your project you’ll be asked to make those estimations of future performance, and that could be in your Schedule, it could be in the Cost of the project, it could even be in the quality of your project. The four main methods that you will come across as part of the PMBOK guide are:

  • Parametric estimating
  • Bottom up estimating
  • Analogous estimating, and;
  • 3-point estimating.

They might sound a little bit funny at first, so let’s go into them in more detail.

First of all we’ve got parametric estimating. This is where we’re actually using a parameter to estimate per item. So it’s a simple parameter, for example 55 meters or $55 per square meter or square foot. We might have a thousand dollars per roll of metal, or twenty days per delivery in our schedule for example, where it might take to get something to another country. We might be looking at two-week sprints per each feature that we’re delivering in a software project, or a team might take an eight-hour workshop to complete a risk assessment. All of these are parameters that we might assign to the activities so that we can estimate for those activities.

Next up we’ve got bottom up estimating. This is where we’re estimating project resources by assigning a value to the lower-level components of the Work Breakdown Structure. We’re starting from the bottom and we’re working our way up. And when we say the bottom we mean the the lower level tasks that have been assigned to our teams. Now these of course go up in the work breakdown structure to the larger tasks or features, and then to an overall delivered feature (and this is where we start getting into Agile potentially or Feature Driven Development) but the idea of that is that this team can estimate on their piece of work, this team can estimate on their piece of work or their single task or one or two tasks, and that might be say $10,000, this one might be $20,000, this one might be $5,000, and then we take all of those items and we bring them up into the feature so the total there could be $50,000 and then the total for the overall feature could be $100,000 for example. But the key is that we’re starting at the very lowest level of the activity, we’re starting from the bottom.

Next up we have Analogous estimating. This is where we’re finding an analogy, something similar to what we’re currently doing. We’re estimating the duration or cost of an activity or a project using historical data from a similar activity or a similar project. Of course this is frequently used to estimate project duration when there is a limited amount of detailed information, so we haven’t gotten down into the Work Breakdown Structure yet at the team level, we only have a really high-level idea. Using Analogous Estimating we can get a rough idea of how much it will cost, or how long it will take by looking at another similar project. It’s like an analogy, it’s similar to what we’re currently doing. Generally it’s less costly and less time-consuming than our other techniques, but also it is less accurate because we’re not really delving into the detail.

Last but not least there is 3-point estimating. This uses an average of three points – we might have the Optimistic estimate, the Pessimistic estimate, and the Most Likely estimate. The way that we end up working it out is: Let’s say our Optimistic schedule (O) is five days, our Most Likely (M) is seven days and then our Pessimistic (P) is ten days. We add each of them together and then we divide that by three, and that gives us the answer.

In fact here’s a better version that doesn’t take as much math or any decimals – let’s say we’ve got five, nine and ten divided by three – because 24 is a nice round number – we divide that by three and we get eight. And that’s how we do three-point estimating.

You might see a variation of this which is “Beta” or “PERT” (Program Evaluation Review Technique), where we’ve got Optimistic, then four times the most likely, and then our pessimistic as well, all divided by six instead.

And those are the project estimating techniques we will come across in the PMP Exam.

– David McLachlan

– See All Project Management Key Concepts –

Decomposition

– See All Project Management Key Concepts –

Decomposition - PMBOKDecomposition

What is decomposition in your project? It’s a technique that’s used for dividing and subdividing the project scope and project deliverables into smaller, more manageable parts. You’re taking something high level and turning it into more manageable pieces, and then maybe those pieces are turned into more manageable pieces as well – that’s decomposing, we’re breaking down that item into smaller pieces.

The level of decomposition is often guided by the degree of control needed to effectively manage that project. For some projects maybe that high level description is enough, and someone can go away and work on that. But in other cases you will need to break it down so that multiple teams will work on these different items and deliver those separate pieces.

Here’s where a work breakdown structure comes into it, and decomposing from a work breakdown structure. Basically we’ve got some branches of the WBS decomposed down through the work package level. We start with the first high level idea, we’ve got a value management system project and then we have the needs assessment, we’ve got standards development, systems engineering, project management as well. As part of that needs assessment we might have a current system ordered, we’ve got requirements determination and we’ve got alternatives development. All of these things need to be done as part of that needs assessment – we’re breaking it down into smaller and smaller parts, pieces that people can actually work on.

Now of course you could do this for an organizational structure as well. You might have an executive and they might have managers at their different levels and then they might have team leaders at levels further down, and you need you might need to know this as part of your stakeholder mapping for your project.

So decomposing things and breaking things down is a very useful way to do your work as a project manager.

Decomposition of the total project work into work packages generally involves the following activities. First of all, we’re identifying and analyzing those deliverables and the related work to those deliverables. We’re structuring and organizing the work breakdown structure, breaking things down into smaller pieces. We’re decomposing those upper layers and levels into the lower detailed components, then we’re developing and assigning identification codes to the WBS components similar to our requirements traceability matrix.

We need a code just to identify that – is it 101, or is it R55? Whatever the code is that makes sense or that you have assigned to these particular items and deliverables. Then we need to continue on as part of our WBS or work breakdown structure. As we’re breaking it down, we need to verify that the degree of decomposition for those deliverables is appropriate. We do that by either assigning it to the appropriate team and making sure that they have enough information to be able to work on this. If we’re using an agile methodology then we would break it down to enough work that could be done usually during a two-week sprint, and we might have multiple two-week sprints. Can they get that done? If not then maybe we need to break it down into smaller pieces of work that we know we can get done in that two-week sprint, so that we’ve got something to deliver at the end of that iteration.

And that is the idea of Decomposition.

– David McLachlan

– See All Project Management Key Concepts –

Validate Scope versus Control Quality

– See All Project Management Key Concepts –

Validate Scope versus Control Quality - PMBOKValidate Scope versus Control Quality

The reason we’re looking at these two in particular is because validate scope and control quality can be confused during your PMP exam. So this is really quick outline of both and what the differences are when you use them so that you will know this specifically for when you get questions about these two items in the PMP exam.

Now, one of these is concerned with having the deliverables signed off (Validate Scope). We’re validating that the scope is okay, and we’re able to sign it off but the other is concerned with ensuring the deliverables are working as they should (Control Quality) – we’re controlling that quality, and we’re testing and were ensuring that they’re working in the way that we wanted them to work.

Here’s where they sit in the project management process groups. They’re both monitoring and controlling processes, and the first one is under scope because we’re validating that scope. We’re signing off that scope and it’s going back to our product sponsor or stakeholders. They’re saying “Yes, I can see that everything is fit for purpose,” and they’re giving it the tick of approval. But before it actually gets to that stage, we are controlling that quality.

With Control Quality, we’re testing it, we’re wanting to make sure that it’s OK, and that it meets the requirements that we had. As we control that quality, once that is complete then that will usually feed into the validation and the sign off of those deliverables. So as you can see deliverables are verified for quality during the control quality process, but they become the input into the validate scope process where we’re signing it off and giving that final tick of approval by the stakeholders.

So Control Quality is the testing and checking of that deliverable to ensure it meets the requirements, we’re usually testing fit for purpose. But Validate Scope is that process of formalizing the acceptance of the completed project deliverables signed off and approved by the authorized stakeholder.

And that is the difference between Control Quality and Validate Scope.

– David McLachlan

– See All Project Management Key Concepts –

The Requirements Traceability Matrix

– See All Project Management Key Concepts –

Requirements Traceability Matrix - PMBOKThe Requirements Traceability Matrix

What is the Requirements Traceability Matrix? It’s a grid or a matrix that links the product requirements from their origin to the ultimate scope we’re going to deliver. It’s a list of the requirements that we’ve gathered from our stakeholders and our customer, and it links those to the deliverables that we are ultimately delivering as part of our project. We’re seeing that those deliverables satisfy the requirements we gathered.

It also provides a structure for managing any changes to the product scope as the project goes along. So why do we do this with this requirements traceability matrix and why do we create this? Well, it helps us ensure that each requirement adds business value by specifically linking it to the business and project objectives that we are delivering. It also provides a structure for managing those changes as we go along.

The process of tracing those requirements will include a few different things as you go along your journey. First of all, we’re gathering the business needs, the opportunities that we have the goals and the objectives of the project, the project objectives and the project’s scope and work breakdown structure deliverables. So we’ve got our requirements with the project scope which is broken it down further into the actual small deliverables that each individual team will be working on and delivering. That’s the most we can break it down to make it nice and easy for people to work on, in small increments.

We’ve got the product’s design – what is it going to look like? The product development test strategy and test scenarios, because we’re looking at the acceptance criteria. How does that link back to those requirements? That’s a very important part of the test strategy, to make sure that those requirements are validated and those deliverables are validated by our customers.

Lastly, the high-level requirements to the more detailed requirements. There are a few attributes that we will put into this Requirements Traceability Matrix, and that will basically help define the key information about those requirements. So these attributes will include a unique identifier – maybe it’s number 103 for example or F75 whatever the actual identifier is that makes sense for the project that you’re working on.

We’ve got a textual description – so an actual description of that particular requirement, and the rationale for its inclusion, who owns that requirement and where it’s come from, the priority 1 to 5 is usually a good measure, the version of that requirement or the version of that deliverable, the current status and the date. Then when we’re looking at that we still also need to match that to the deliverables.

And that is the requirements traceability matrix.

– David McLachlan

– See All Project Management Key Concepts –

The Project Scope Statement

– See All Project Management Key Concepts –

Project Scope Statement - PMBOKThe Project Scope Statement

What is the project scope statement? It is probably one of the most important documents that you’ll find in your project management plan for a couple of reasons.

The project scope statement is the description of the project scope, and the description of the major deliverables that we’ll be delivering as part of this project. It includes any assumptions that we have made in the idea of finding the scope, and also any constraints that we know about.

It’s a really clear picture of what we’re going to be doing as part of our project. The detailed project scope statement includes these things:

The scope description, which is progressively elaborated. That means we could iteratively improve this as time goes on. We might find more items here or there and ultimately then we’ll have our scope statement, but we will have iteratively worked on it and improved on it over time.

Once it gets to a certain stage that we’re happy with, and our stakeholders are happy to lock that in its locked in as a baselined document, which means that any future changes need to go through an official change control process, usually signed off by the project sponsor.

We have the project deliverables, so what are we actually delivering? The acceptance criteria – what is the definition of done for these particular deliverables? How do we know when they’re complete?

Then any exclusions that we have in that scope. Maybe we’re not delivering a certain part, and defining that upfront really helps us so that we don’t have any scope creep as that project goes along.

Now why are we creating this? The scope statement basically enables a product team to perform more detailed planning on the scope, and it guides the project team’s work during the execution of the project. It provides the Baseline once we’ve locked it in, for evaluating whether requests for changes or additional work are contained within or outside of the projects boundaries. You will see this a lot in your project management career.

In any project there are many different stakeholders. If you have a baselined scope statement and all of a sudden a customer or a stakeholder says “I really want this item, and I want this item too,” if we’ve got a really solid scope statement so we know what is in scope and what’s out of scope then we can say “Yes, we can definitely work on this piece, maybe we can even work on this piece, but this one is specifically excluded.”

If you want to make a change, you have to raise that change request and go through our configuration management process. That is why it’s so important to have a project scope statement and work with that as we’re going along on our project.

– David McLachlan

– See All Project Management Key Concepts –

Product or Solution Analysis

– See All Project Management Key Concepts –

Solution Analysis - PMBOKProduct Analysis

Product analysis, which is also the solution analysis because the product is what we’re going to be delivering, is the solution from all the requirements that we’ve gathered from our stakeholders. This is how we analyze and start creating that product and the idea of that product and solution.

What is product analysis?

First of all it can be used to define the products and the services that we’re going to be delivering as part of our project. Being a project manager it includes asking those questions about the product or service and forming answers to describe the use and characteristics and other relevant aspects of what is actually going to be delivered. Keep in mind we’ve already gathered the requirements, or what our customers want. But that doesn’t mean that we actually have a solution or a product in mind. We have to turn those requirements into a solution that ultimately a customer can see, feel and touch.

There are a few different techniques to product analysis techniques, and these might include product breakdown, which is breaking down the idea of the product into smaller pieces.

Requirements analysis which is going into those requirements and really breaking those down and matching those up to key pieces of our solution.

Systems analysis, which are the systems that we’re working with – do we have any limitations there?

Systems engineering, where we’re looking at the architecture behind things, and how we can actually engineer this product.

Value analysis, so are we might be rating from one to five and this is where the key concept of voting comes into it as well. Maybe we’re voting for the value of the particular requirement that we’re wanting to put into this solution.

Value engineering, or how can we engineer the most value out of this particular product with the least amount of effort?

As you can see there is more than one accepted method for translating these high-level product or service descriptions into meaningful deliverables. When we’ve got the idea of our solution, we still actually have to break these down into smaller pieces so that our teams can start working on those smaller pieces, and deliver those smaller pieces bit by bit. Requirements are captured at the higher level and they’re decomposed, which you’ll see is a project management body of knowledge key concept as well. They’re basically broken down into the level of detail that is needed to design and deliver the final product.

And that is the idea of product or solution analysis.

– David McLachlan

– See All Project Management Key Concepts –

Voting

– See All Project Management Key Concepts –

Voting - PMBOKVoting

What is voting? You’ll come across this in your project management career when we’re gathering requirements, and in other project process group areas as well. Voting is a very common way to get to a decision when a decision is need needed to be made. The way it’s described in the PMBOK guide is a “collective decision-making technique”. It’s an assessment process where we’re able to assess a few different options and see which option we actually want to move forward with.

When we have multiple alternatives, those are our options, with an expected outcome in the form of future actions. In other words, what are we going to do in the future? If we can’t all agree (and sometimes that’s totally fine) but there are other ways that we can move forward, and that’s what we use voting for.

These techniques can be used to generate, classify and prioritize your product requirements in the early days as you’re gathering these requirements for your product and your project. There are a few voting techniques that you’ll come across and that you’ll see in the PMP exam and the CAPM exam.

We’ve got unanimity, where where everybody agrees – so you’ve got the a hundred percent of people and everyone is happy, everyone agrees that they’re going forward. You have unanimity, they’re unanimous.

But you may not have that in your case, so the next step down from that is where we have the majority of people. This is where a decision is reached where and more than 50% of the members of the group agree. Instead of a hundred percent now we have more than fifty percent, and we’re able to move forward because that is the majority of people.

Now even then if you’ve got a large group of people, or maybe there’s a lot of different decisions to be made, you may not have the majority. So the last one is plurality.

Plurality is a decision that’s reached where the largest block in your group decides. Maybe you have 30% of the people agreeing for that particular decision and then all of the others are 20%, 10%, 5%, another 20% and whatever else it takes to make up the hundred percent. But none of those are a large enough block to get to that thirty percent, which is the largest block. And that’s the one that you’re able to move forward with.

There is a variation of voting. Voting is used throughout many different projects life cycles including the agile, iterative or incremental life cycles. One variation that they use is the fist of five.

The Fist of Five

The fist of five is where the project manager simply asks the team to show their level of support for a decision (i.e. your future actions, what are we going to be doing) and holding up a closed fist which would be no support, or five fingers which would be full support for a particular decision, or any fingers in between. The power of doing it this way is that if a team member holds up fewer than three fingers, then that team member is given the opportunity to discuss their objections with the team, and that gives them a voice. Maybe they advise of some risks or some ideas that other people have not thought of, that we need to consider as a team. The project manager can continue that until the team achieves a consensus or they agree to move on to the next decision, because maybe they haven’t agreed. They have achieved a majority for example or a plurality.

And that is the idea of voting in your project.

– David McLachlan

– See All Project Management Key Concepts –